
To send internal notification and task creation when ever new message received.
You can set up a HubSpot workflow that alerts your team every time a contact sends a WhatsApp message through the Tiyora WhatsApp Integration. The workflow sends an in-app notification to the users or teams you choose and creates a follow-up task, so no incoming message goes unanswered.
Before you start
- The Tiyora WhatsApp Integration is installed and connected to your HubSpot portal.
- You have permission to create and edit workflows in HubSpot.
- The users or teams who should receive notifications have HubSpot user seats.
Step 1: Create the workflow and set the trigger
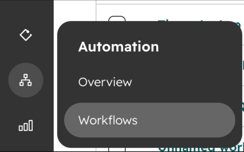
- In HubSpot, go to Automation > Workflows.
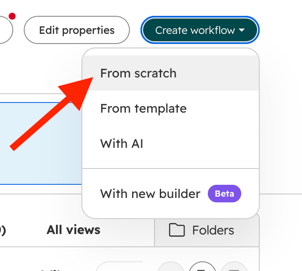
- Click Create workflow > From scratch.
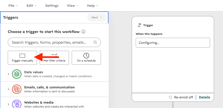
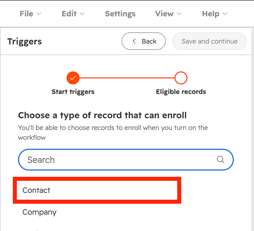
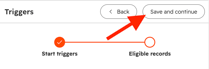
- Click Trigger manually, select Contact as the object type, then click Save and continue.
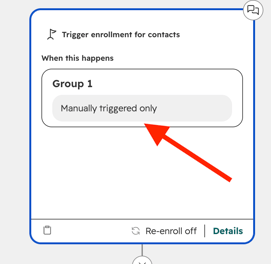
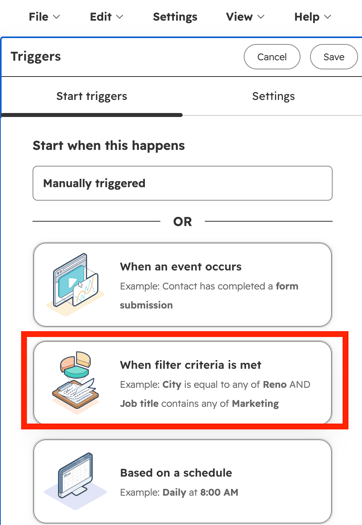
- In the trigger panel, click Group 1: Manually triggered only and change it to When filter criteria is met.
- Turn Re-enrollment on, so the contact is enrolled again for every new message, not just the first one.
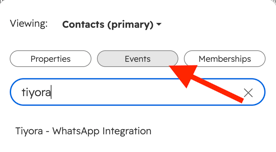
- Click Events, then select Tiyora WhatsApp Integration > Message received.
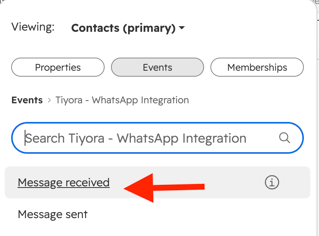
- Add the Criteria> Message> Message is known. This enrolls the contact whenever any WhatsApp message comes in.
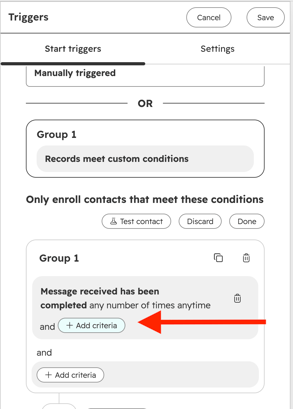
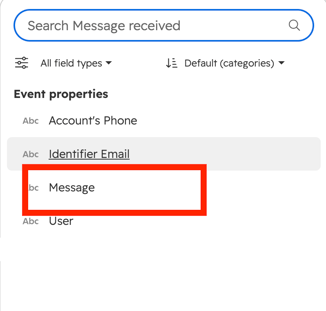
- Click Save.
Important: If re-enrollment is off, you will be notified only for the first message a contact ever sends.
Step 2: Send an in-app notification
- Click the + icon below the trigger.
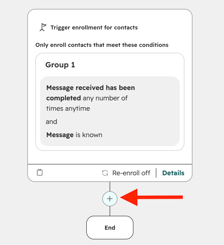
- Select Communications > Send internal in-app notification.
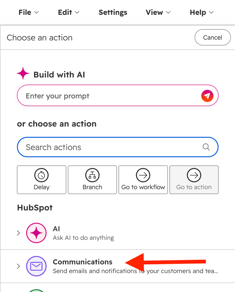
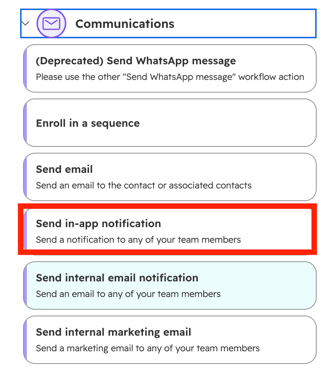
- Under recipients, select the users or teams who should be notified.
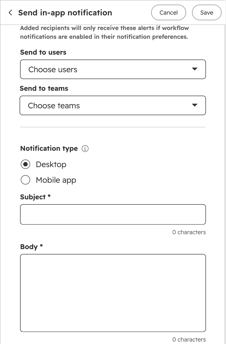
- Enter a Subject, for example: New WhatsApp message received.
- Enter the Message body, for example: A contact just sent a WhatsApp message. Please check the conversation and respond. Use Insert data to add contact details such as name or phone number.
- Click Save.
Step 3: Create a follow-up task
- Click the + icon again, below the notification action.
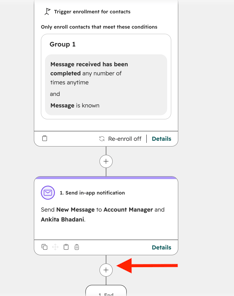
- Select CRM > Create task.
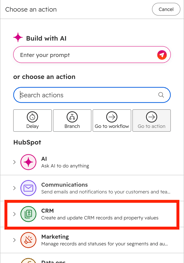
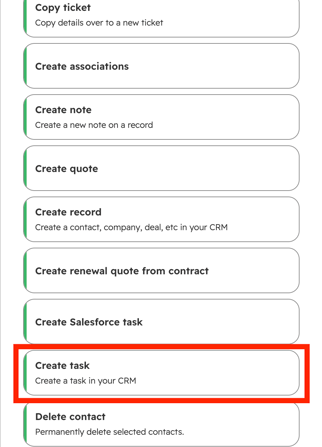
- Enter a Task title, for example: Reply to WhatsApp message.
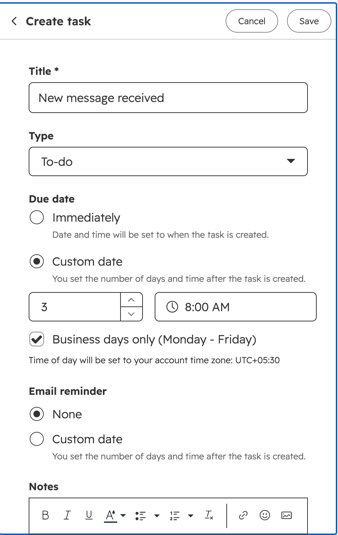
- Set the Due date (for example, same day or 1 business day after enrollment).
- Under Assign to, choose the user, team, or the contact owner.
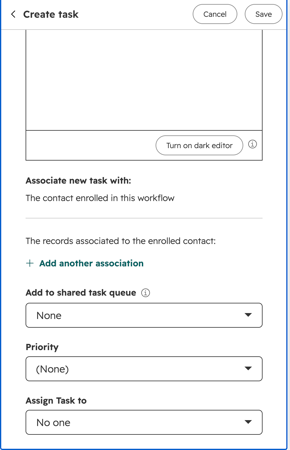
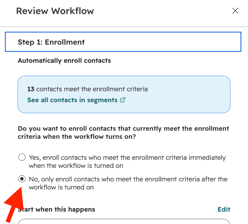
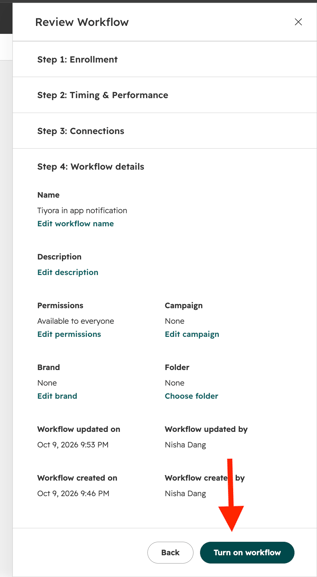
- Click Save, Name the workflow> review and turn on the workflow, and click NO
Tips and FAQs
Can I notify only the contact owner? Yes. In the notification action, choose Contact owner as the recipient instead of specific users or teams.
I'm getting too many notifications. What can I do? Add extra filters to the trigger, for example a lifecycle stage or a specific contact property, so only relevant contacts enroll.
Notifications aren't arriving. Check that the workflow is turned on, re-enrollment is enabled, and the recipients have in-app notifications enabled under Settings > Notifications in HubSpot.
Do I need both the notification and the task? No. Each action is optional. Use only the notification for quick alerts, or only the task if your team works from the task queue.
Having troubles? File a Support Ticket or Book a call!